You haven't signed in yet, you can have a better experience after signing in
 CloudDrive multi cloud disk local mount management tool software

Activity Rules
1、Activity time:{{ info.groupon.start_at }} ~ {{ info.groupon.end_at }}。
1、Activity time:cease when sold out。
2、Validity period of the Group Buying:{{ info.groupon.expire_days * 24 }} hours。
3、Number of Group Buying:{{ info.groupon.need_count }}x。
Please Pay Attention
1、Teamwork process: Join/initiate a Group Buying and make a successful payment - Within the validity period, the number of team members meets the activity requirements - Group Buying succeeded!
2、If the number of participants cannot be met within the valid period, the group will fail, and the paid amount will be refunded in the original way.
3、The number of people required and the time of the event may vary among different products. Please pay attention to the rules of the event.

CloudDrive multi cloud disk local mount management tool software



What is CloudDrive?
- CloudDrive is a comprehensive cloud storage management platform designed to seamlessly integrate multiple cloud storage services into one interface.
- With CloudDrive, you can easily manage and access all cloud storage services without having to switch back and forth between different applications and interfaces.
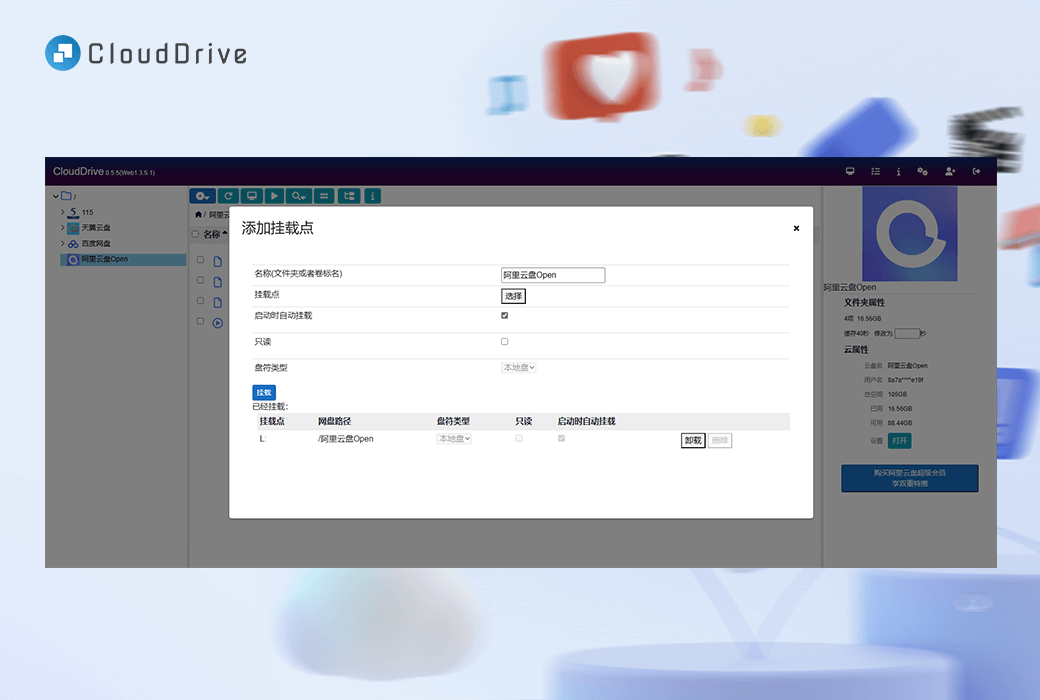
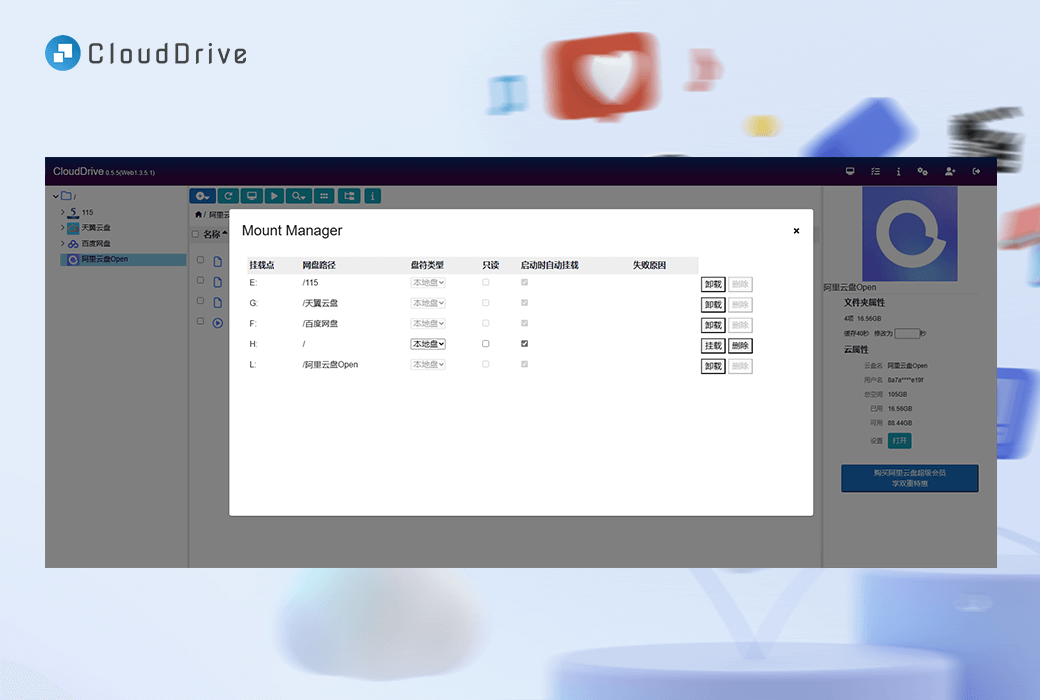
- The most striking feature of CloudDrive is its ability to mount multiple cloud storage services as local disks, allowing direct access to files without the need for pre downloading. Imagine that you can use cloud storage services as part of your local file system, and the convenience it brings is self-evident.
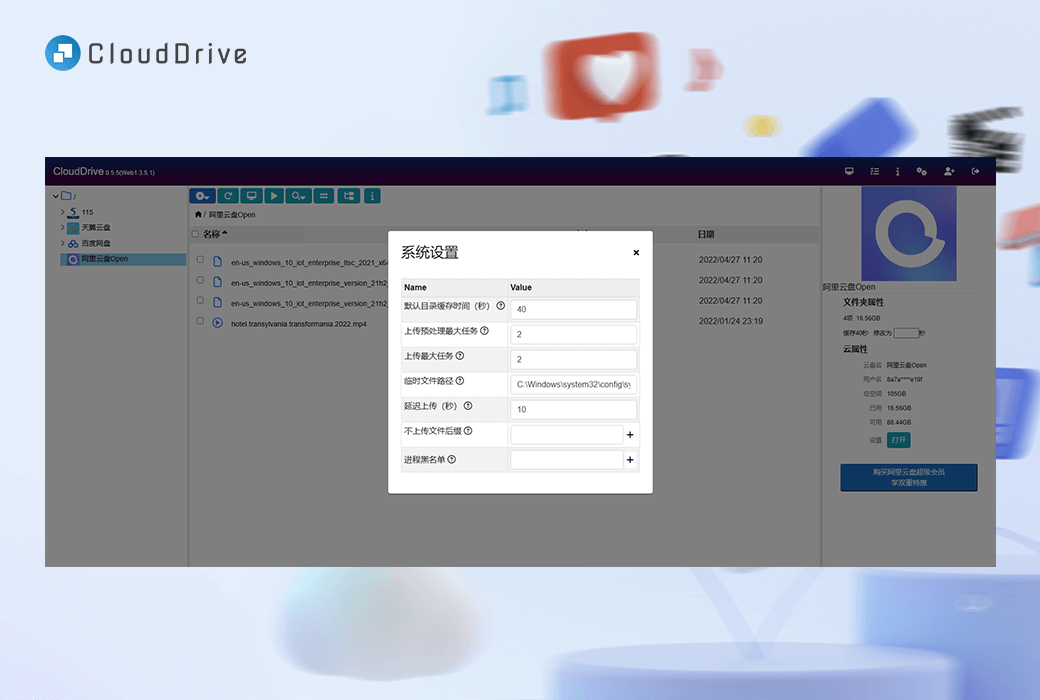
- But that's not all - CloudDrive also offers advanced features such as fast cloud file transfer, real-time cloud file notifications, and application level permission control. Whether you are an advanced user or a regular cloud storage user, CloudDrive can fully unleash the potential of cloud storage resources with excellent efficiency and ease of use.
Main characteristics
- Cloud disk local mounting
Mount multiple cloud disks to local drives as if they were part of the computer's file system. Say goodbye to the trouble of downloading files from the cloud.
- Unified multi cloud disk management
Manage all cloud storage accounts in one place. Easily organize files, synchronize folders, and perform advanced searches across different cloud services. Currently supported123 Cloud Drive, Alibaba Cloud Drive, Baidu Cloud Drive, Tianyi Cloud Drive, 115 Cloud Drive, Google Drive, PikPak, WebMAV Server, OneDrive, Thunder Cloud Drive, and local folders.
- Login once, use everywhere
Log in to all cloud storage accounts in one place and use them on any device without having to log in to different accounts every time.
The cloud disk account synchronization mechanism is secure.
- WebDAV service
CloudDrive, as a WebDAV server, can provide WebDAV services to other WebDAV clients.
- Quickly copy files across cloud disksPro
Quickly and directly transfer files between cloud drives without the need for intermediate downloads. Save time and bandwidth through CloudDrive's optimized file transfer feature.
- Document Change Notice
Receive real-time notifications about changes to cloud files. Seamless integration with file system monitor applications for seamless collaboration.
- Application level permission control
Fine control file access permissions. Define and manage access permissions at the program level to ensure secure sharing and collaboration.
- Hello, cloud storage service provider
Use CloudDrive instead of being a cloud storage vampire.
We ensure a smooth user experience while minimizing the resource consumption of cloud storage operators.
- Multi cloud disk backup (upcoming)
Backup local disks to multiple cloud disks simultaneously. Automatically detect file changes and perform incremental backups. Multi cloud backup, worry free data.
- Run on any device
Computers: Windows, Linux, macOS
NAS:Synology, QNAP...
TV phones: Android, LibreElec, CoreElec
Router: OpenWRT Router
Using CloudDrive
- computer
Download and install the latest version of CloudDrive, which allows you to have a unified cloud storage management center on your computer and expand your cloud drive into your local hard drive.
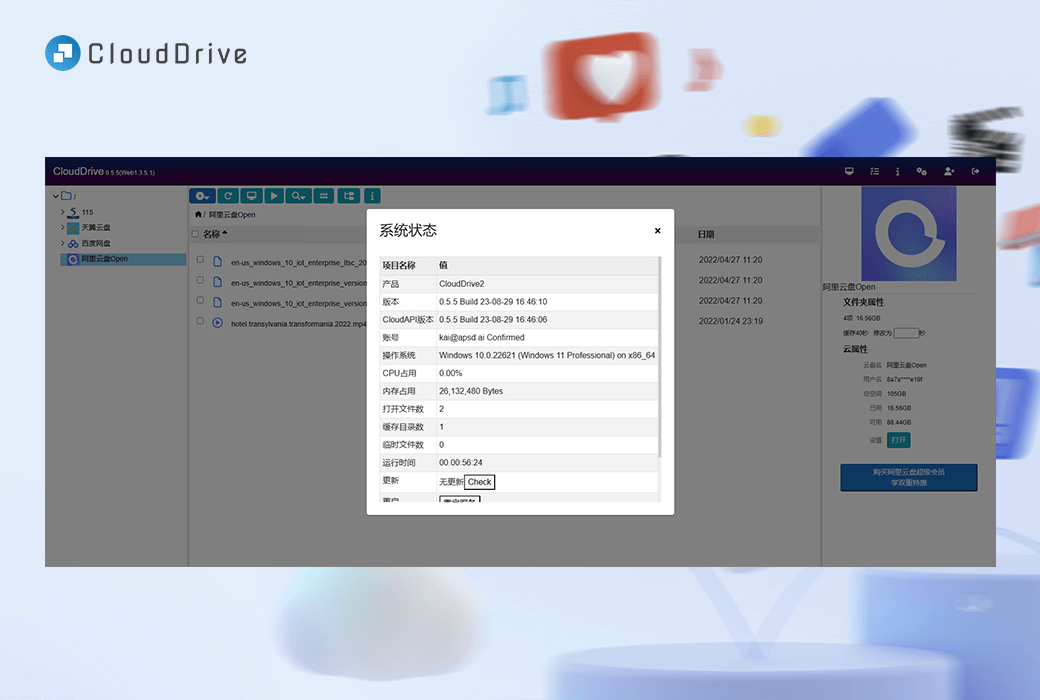
CloudDrive currently supports Windows x64 Linux、macOS, Computers that support architectures such as x86_64, arm64, armv7, etc.
- NAS
Installing the latest version of CloudDrive on your NAS can turn it into a unified cloud disk management center, expanding your cloud disk into the disk of your NAS.
CloudDrive currently supports mainstream NAS platforms such as Synology, Unraid, Qna p, and NAS architectures such as x86_64, arm64, armv7. It can be installed directly or through Docker. Synology and Qna p can also directly install CloudDrive plugins provided by third parties.
- mobile phone
CloudDrive can run on Android phones, extending your cloud drive to local storage. With CloudDrive, you can consolidate multiple cloud disks into a unified storage space, and all apps installed by users can directly access locally mounted cloud disk files.
CloudDrive supports Android 7.0 and above versions and requires root privileges to use the local mounting feature on the Android system.
- television
CloudDrive can run on TVs or set-top boxes, expanding your cloud drive to local storage. With CloudDrive, you can integrate multiple cloud drives into a unified storage space and play locally mounted cloud drive files directly through the built-in player on the set-top box.
CloudDrive supports Linux based systems such as LibreElec and CoreElec, as well as Android based TVs or set-top boxes (requiring root privileges to use local mounting on Android systems).
- Router
CloudDrive can run on OpenWRT routers, turning the router into a NAS with your cloud drive as its content. You can integrate them into a unified storage space through simple configuration.
CloudDrive supports OpenWRT routers with x86_64, arm64, and armv7 architectures, which can be downloaded and run directly or through Docker.

Official website:https://www.clouddrive2.com/
Download Center:https://clouddrive.apsgo.cn
Backup Download:N/A
Delivery time:24-hour automatic shipping
Operating platform:Windows、Linux、macOS、Android、Docker、Nas
Interface language:Supports Chinese interface display.
Update instructions:Used and updated during the subscription period.
Pre purchase trial:Free trial before purchase.
How to receive the goods:After purchase, the activation information will be sent to the email address at the time of placing the order, and the corresponding product activation code can be viewed in the personal center, My Orders.
Number of devices:Free users: Up to 2 devices can be online simultaneously. Paid members: up to 5 devices online simultaneously
Replacing the computer:Uninstall the original computer and activate the new computer.
Activation guidance:Please download the latest version (Web 1.3.6.0+) from the official website, then click on the membership plan, drag it to the bottom, click "I have an activation code", copy and paste it, and click on "activate".
Special instructions:To be added.
Reference materials:https://www.clouddrive2.com/pricing.html

Any question
{{ app.qa.openQa.Q.title }}
How to install CloudDrive 2 on an Android phone?
Post organized by @ tanlidoushen
1、 Prepare necessary software and tools
1.Termux
CloudDrive 2 The current Android version requires binary files to be run in the/data directory of the device in command-line form, and cannot be run directly by clicking install like regular APK files.
To execute these binary files, the following two methods can be used:
Using adb shell: adb is an abbreviation for Android Debug Bridge, which is a command-line tool in the Android Development Kit (SDK). By connecting a phone to a computer and using adb shell commands, one can enter the device's command-line interface and execute binary files within it.
Using Termux: Termux is a terminal emulator application that runs Linux environment on Android devices. You can run binary files by using the corresponding commands in Termux.
This article introduces the operation of TermuxCloudDrive 2 The way
Termux obtains the address as:
https://f-droid.org/zh_Hans/packages/com.termux/
After installation, enter the following command to determine the CPU architecture of the device:
dpkg --print-architecture
2. MT Manager
By using MT Manager, it is possible to access Termux's home directory with non root privileges when running Termux, saving a lot of steps.
Firstly, run Termux in advance, and then click on the top left corner in the MT Manager. In the drop-down list, you can add local storage and select Termux. The root user has direct access to the home directory of Termux and can skip this step.
The home directory of Termux is located at
/data/data/com.termux/files/home/
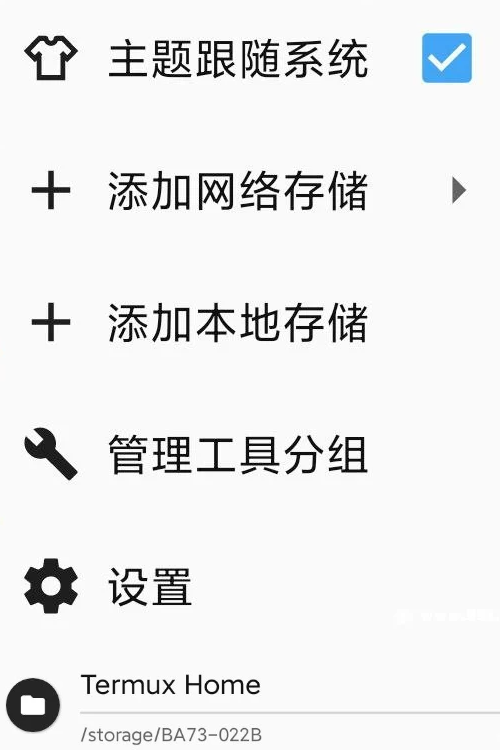
3. Prepare an Android version of Cloud Drive 2 that is compatible with the device architecture being used.
CloudDrive 2 After version 5.0, publish updates on GitHub and download the appropriate version based on the results returned by Termux
https://github.com/cloud-fs/cloud-fs.github.io/releases
The file with the same name is named clouddrive-2.tgz
Move files to the home directory of Termux added by MT Manager earlier. The root user can directly move files to
/data/data/com.termux/files/home/
In the directory
4. fuse 3 [Skip for non root users]
In the Android system, to mount a cloud drive to local storage, you need to first obtain root privileges and use compiled and adapted Fuse3.
Here is the version compiled by the expert, and you need to download the corresponding version according to your own architecture. The result returned by Termux isaarch64,Choose arm64 instead of another one.
https://forum.xda-developers.com/t/fusermount-on-android-rclone-mount.3866652/
After downloading and decompressing, rename the obtained file as fusermount3 and then move it to
data/data/com.termux/files/usr/bin
Under the directory,And change the permission to 700
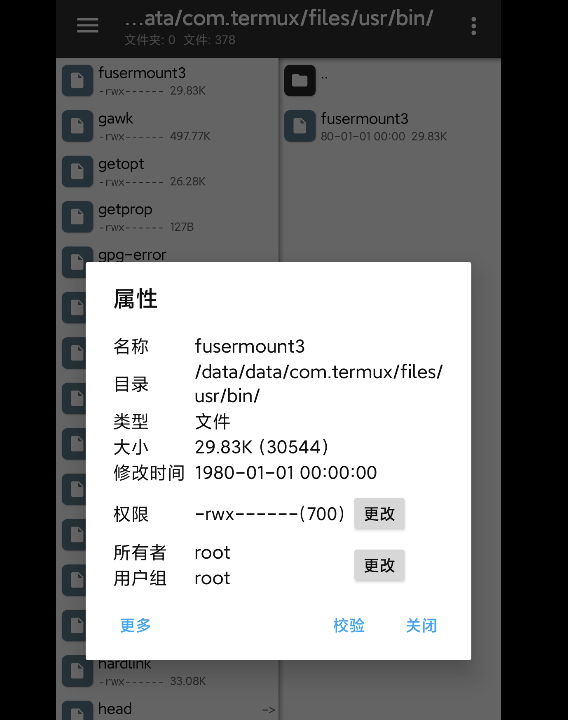
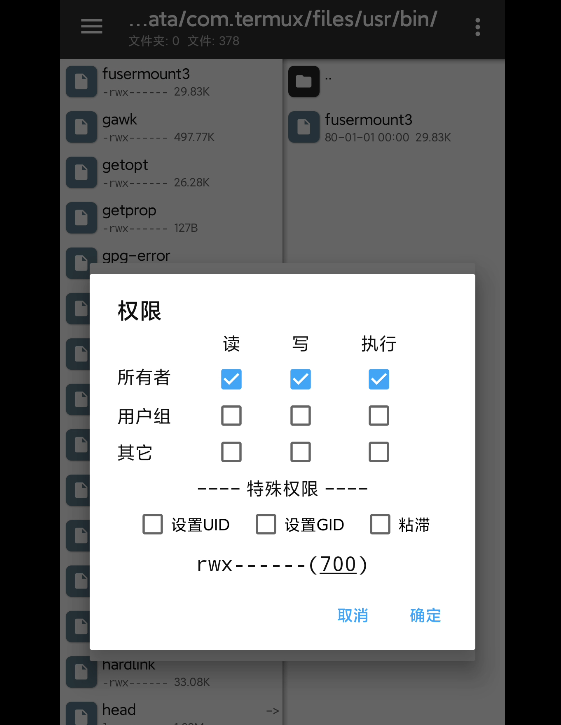
2、 Deploying Cloud Drive 2 in Termux
1. Permission elevation [skipped by non root users]
Enter in Termux
pkg install tsu
This command installs a software package called tsu, which is a privilege escalation tool on Termux that allows you to run commands as a superuser.
2. Extract the cd2 package file
Input:
tar -zxvf clouddrive-2.tgz
3. Rename the decompressed folder
Check the name of the extracted folder in the mt folder
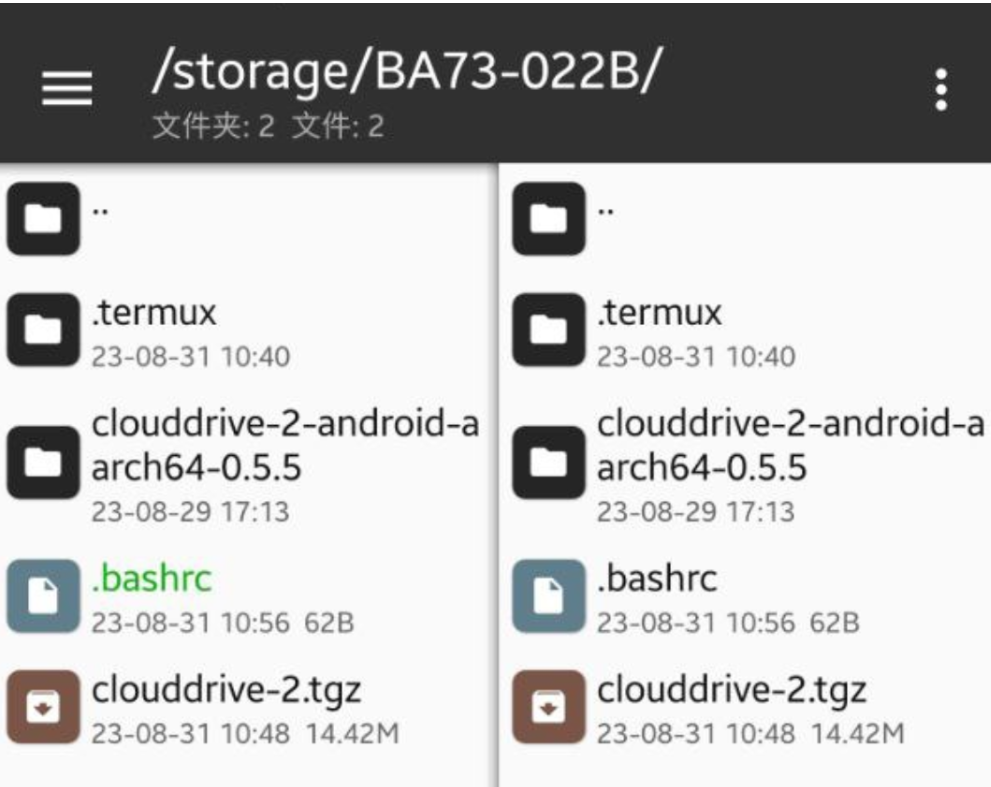
Simply change the root user to clouddrive-2
Non root users do not have direct modification permissions. Use the following command to rename it
Mv [folder name] clouddrive-2
If the folder you extracted is named clouddrive-2-android-aarch64-0.5.5
So the command is
mv clouddrive-2-android-aarch64-0.5.5 clouddrive-2
3、 Quick Run in TermuxCloudDrive 2
Create a. bashrc file in the home directory of Termux and edit the file.
If you want to open Termux, enter "cd2" and run cd2 quickly
Non root user addition:
function cd2 {
cd ~
cd clouddrive-2/
./clouddrive
}
Add root user:
function cd2 {
(cd ~ && sudo nsenter -t 1 -m -- /bin/bash -c "cd /data/data/com.termux/files/home/clouddrive-2/ && sudo ./clouddrive")
}
If you want to open Termux, it will automatically runCloudDrive 2
Non root user addition:
(cd ~ && cd clouddrive-2 && ./clouddrive)
Add root user:
(cd ~ && sudo nsenter -t 1 -m -- /bin/bash -c "cd /data/data/com.termux/files/home/clouddrive-2/ && ./clouddrive")
Next, you can close itAfter Termux, open it again and see if the above shortcut commands take effect. If not possible, you can input
chmod +x ~/.bashrc
Add execution permissions to. bashrc.
To mount a directory to a non data directory, you can check the folder under this directory
/mnt/runtime/
Post organized by @ tanlidoushen
